


Master the Tuya Smart App to unlock full control over your smart home from a single, powerful platform. The Tuya Smart App lets you connect, manage, and automate thousands of compatible devices—from smart lights and plugs to sensors and cameras—across different brands in one intuitive interface. By learning how to use Tuya Smart effectively, you can create custom scenes, set advanced automations, integrate voice assistants like Alexa and Google Assistant, and build a flexible, scalable smart home ecosystem that works seamlessly and efficiently every day.
Table Of Content
- First Steps: Downloading, Installing, and Creating Your Account
- How to Download and Set Up the Tuya Smart App Safely and Correctly
- Registering Your Account with an Email or Phone Number
- Navigating the App’s Home Screen for the First Time
- Adding Your First Smart Device to the App
- Putting Your Device in Pairing Mode (Reset Methods)
- Using the “Add Device” Button and Selecting the Correct Category
- Question-Answer
- I just bought my first Tuya smart plug. What are the very first steps to set it up?
- Why won’t my Tuya device connect during setup? The light is blinking but the app can’t find it.
- Can I control my Tuya devices when I’m not at home?
- What’s the difference between Scenes and Automations in the Tuya app? They seem similar.
- I’m worried about privacy. What data does the Tuya app collect, and can it work offline?
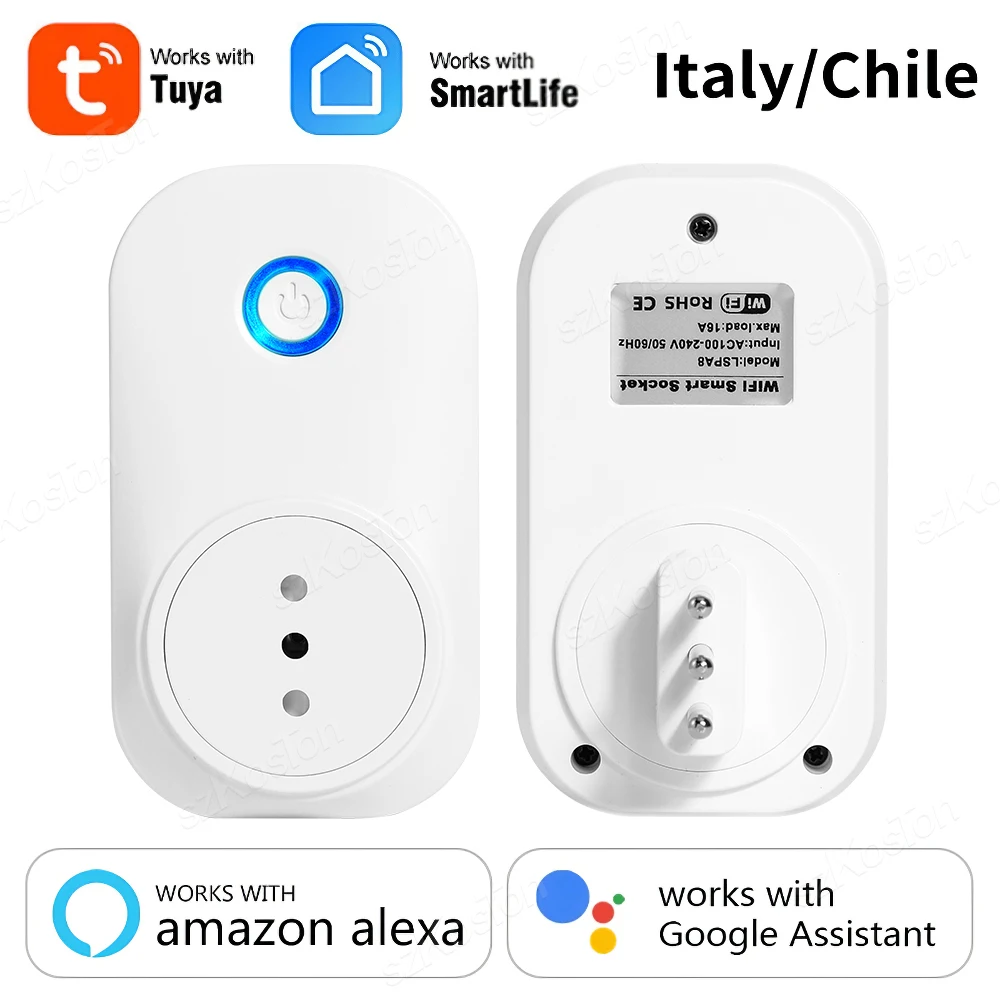
- Use the official Tuya Smart or Smart Life app from App Store or Play Store and register with email or phone for centralized device management.
- Ensure your phone and devices are on the 2.4 GHz Wi-Fi network before pairing; 5 GHz is unsupported for most Tuya devices.
- Use the Add Device button, select the correct category, and put gadgets in pairing mode for successful automatic discovery and setup.
- Create Scenes for one-tap actions and Automations for rule-based tasks to link devices and automate daily routines.


Begin by downloading the official application from your device’s app store and creating an account. Your primary objective is to establish a stable 2.4 GHz wi-fi network, as most smart plugs, light bulbs, and security cameras from brands like Gosund and LSC Smart Connect require this band for initial pairing. Ensure your phone is connected to this same network before proceeding.
The core of your experience is the central dashboard. This is where you will control all added devices, from a Teckin smart power strip to a Lepro LED strip. The setup process typically involves powering on a new device and selecting the “Add Device” icon, which often triggers an automatic discovery or a prompt to scan a QR code. For products like the Sonoff temperature sensor, this installation phase is critical for accurate data reporting.
Move beyond simple remote control by exploring automation. Create rules such as “if the door sensor opens, then turn on the entryway light.” This logic allows different gadgets to work in concert. Furthermore, build one-tap scenes like “Good Morning,” which can simultaneously open MoesHouse smart curtains, adjust a thermostat, and start a coffee maker, transforming multiple actions into a single command.
First Steps: Downloading, Installing, and Creating Your Account
Search for “Tuya Smart” or “Smart Life” in your device’s official app store; both platforms work with the same ecosystem of products.
Install the application, then launch it and tap Sign Up. Use an email address or phone number for registration–this account becomes the central hub for all your future devices.
After verifying your account, you will enter the main dashboard. This empty screen is your command center, ready for device pairing. Before adding hardware, ensure your phone is connected to a 2.4GHz Wi-Fi network, a requirement for most smart plugs, lights, and cameras.
Begin the setup by tapping the ‘+’ icon. Select the appropriate device category, like Lighting or Socket. Power on your new gadget, such as a Gosund smart plug from Amazon or a Teckin LED bulb from AliExpress, and follow the in-app prompts for configuration.
Successful installation places a tile for that device on your dashboard. Tap any tile to control it directly. Immediately explore the automation tab to create simple scenes, like a “Coming Home” scene that turns on compatible lights and outlets simultaneously.
Your foundational configuration is complete. The platform is now primed for expanding your network of devices and building complex routines.
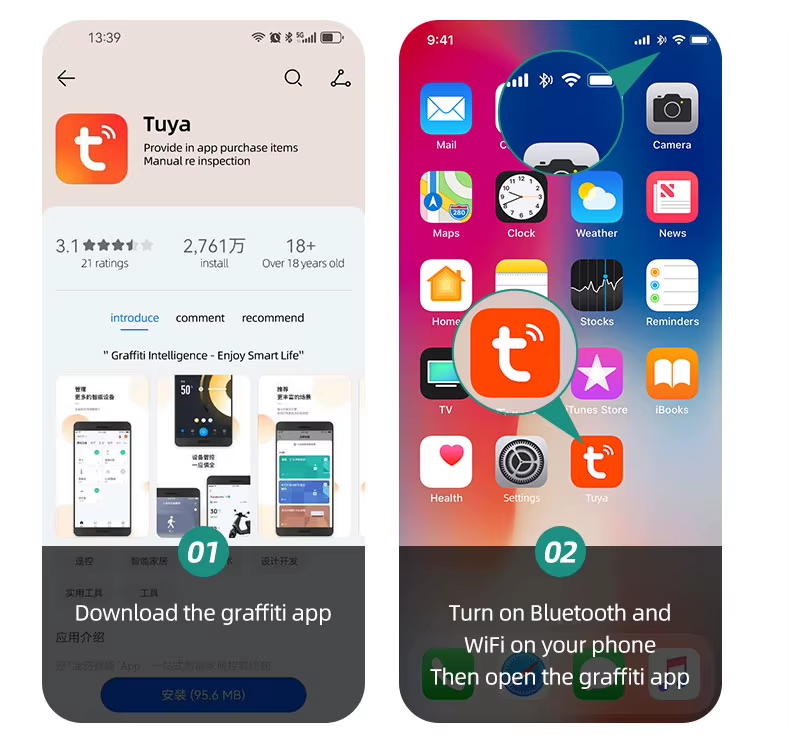
Download the official application exclusively from the Apple App Store for iOS or Google Play Store for Android. Avoid third-party stores to prevent security risks and ensure compatibility with your new devices.
Search for “Smart Life” or “Tuya Smart” on these platforms; both are authentic applications from the developer. The “Smart Life” icon is a white house on a blue background, while “Tuya Smart” typically features a white “T” on orange.
Verify the developer is “Tuya Inc.” or “Tuya Global Inc.” before installing. This guarantees you receive the correct software for device setup, crucial for products like the Gosund Smart Plug from Amazon or the LSC Smart LED Strip from AliExpress.
Post-installation, launch the application to begin the configuration process. The initial dashboard will guide you through adding your first gadget, initiating the pairing sequence, and connecting it to your home Wi-Fi network.
For a seamless installation, have your Wi-Fi password ready and ensure your phone is connected to the 2.4GHz band. This step is essential for the successful pairing of most smart bulbs, sensors, and switches.
Once your devices are added, explore the dashboard to create automation routines and customize advanced settings. This central control panel manages all your connected products, from robot vacuums to thermostats.
Registering Your Account with an Email or Phone Number
Choose a phone number for fastest verification, especially for regions like the EU or North America. An email address is ideal for creating a permanent, device-independent login record.
Follow this process during initial setup:
- Launch the application and tap “Sign Up”.
- Select your country/region code if using a mobile number.
- Enter a valid email address or full phone number.
- Check your inbox or SMS for the 6-digit verification code and enter it.
- Create a strong password combining letters, numbers, and symbols.
- Accept the privacy policy and user agreement to complete registration.
This account becomes the foundation for all subsequent actions:
- Centralized Dashboard: Your registered account syncs all device states to a single dashboard, whether you add a Gosund Smart Plug from Amazon or a LSC Smart Ceiling Light from AliExpress.
- Secure Device Binding: Account credentials securely link each new device to your profile during the pairing process, preventing unauthorized access.
- Scene Configuration: Registered users can build automated scenes, like “Good Morning,” that trigger multiple devices simultaneously after the initial installation.
- Remote Access: Login credentials enable remote control of your home network’s connected devices from anywhere, independent of your local Wi-Fi.
Critical tip: Use the same login method (email or phone) across all your mobile platforms to avoid configuration conflicts. If you face issues receiving the SMS code, the email option often resolves it. This account is mandatory before any smart product, such as a Teckin Smart Bulb or Moe’s Thermostat, can connect to your home Wi-Fi network during its setup routine.
Navigating the App’s Home Screen for the First Time
Immediately focus on the central dashboard, your primary control panel for all connected devices.
Tap the large “+” or “Add Device” button to initiate a new device setup. This process typically involves ensuring your gadget, like a Gosund smart plug from Amazon or a Teckin bulb from AliExpress, is in pairing mode, then connecting it to your 2.4GHz Wi-Fi network.
Your successfully paired devices appear as interactive tiles on the main screen. Organize them by room–like “Living Room” or “Bedroom”–for efficient access.
| Key Dashboard Icon | Primary Function |
| Scenes (often a star or play icon) | Execute pre-set actions like “Good Morning” to simultaneously adjust lights and thermostat. |
| Automation (clock or flowchart icon) | Create rules, such as having lights turn on automatically at sunset. |
| Profile/Settings (person icon) | Access account management, shared device lists, and app preferences. |
Long-press any device tile to access advanced options like firmware updates, renaming, or grouping. For example, group several AliExpress Moes light switches to control them as one unit.
Check the top section for critical alerts, such as a device going offline or a firmware update required for your BSEED ceiling fan from Amazon.
Explore the “Scenes” and “Automation” tabs early; they transform simple device control into intelligent home management, moving beyond basic remote functions.
Adding Your First Smart Device to the App
Ensure your new gadget is powered on and in pairing mode, typically indicated by a rapidly blinking LED light. For a Wi-Fi smart plug from Amazon, this usually requires holding a physical button for 5 seconds.
Tap the ‘+’ icon in the upper right corner of your dashboard. Select ‘Add Device’ and the app will automatically scan. If unsuccessful, manually choose the device category, like ‘Socket (Wi-Fi)’.
Connect your phone to the device’s temporary hotspot network, which often appears as ‘SmartLife-XXXX’. The application will guide you back to your home Wi-Fi for the final network configuration. Enter your 2.4GHz Wi-Fi password precisely; 5GHz networks are not supported for most basic devices.
Wait through the 30-60 second setup process. A success message will appear, and your new smart bulb or sensor will populate on the main screen. Rename it clearly, e.g., “Bedroom Lamp,” for easy voice control and future automation.
Immediately test basic control via the app. For a deeper setup, explore creating scenes–like a “Good Morning” scene that turns on your AliExpress smart light strip and a coffee maker plugged into a smart socket simultaneously.
Putting Your Device in Pairing Mode (Reset Methods)
Begin by locating the physical button on your gadget; for a Gosund smart plug from Amazon, press and hold the power button for 5-7 seconds until the LED indicator flashes rapidly.
Many bulbs, like those from LOHAS on AliExpress, require a power cycle: turn the light on and off via its wall switch three times until it pulsates. This standardized reset clears previous network configuration.
If a device lacks a button, use a pinhole reset. Insert a paperclip into the recessed hole on products like a Zemismart curtain motor for 10 seconds until you hear a beep or see a flash. Release only after the signal confirms factory reset.
Successful pairing mode is always indicated by a blinking light, distinct from a solid or slow-pulsing state. Consult the quick start guide for your specific model if the standard methods fail.
Once the indicator blinks, immediately proceed to add the device in the application. The setup wizard will search for it. Avoid delaying, as most gadgets exit this discoverable state after 1-2 minutes.
Post-installation, your new device will appear on the main dashboard. From here, integrate it into automation routines or scenes like “Good Morning” to control multiple products with a single command.
Using the “Add Device” Button and Selecting the Correct Category
Tap the large “+” or “Add Device” button, typically found centrally on your main dashboard. This action initiates the pairing process, not the physical device setup.
Immediately choose your device’s category from the list. Correct selection is critical for a smooth wi-fi connection. For a “MINGER Smart LED Light Strip” from Amazon, select Lighting > Light Strip. For a “Gosund Smart Plug” from AliExpress, choose Sockets & Switches > Smart Plug.
Scroll carefully; categories are specific. A robot vacuum belongs under Small Home Appliances > Sweeping Robot, while a smart bulb falls under Lighting > Light Source. Misclassification often leads to failed pairing.
The app will then guide you through device-specific steps, ensuring your gadget and phone connect to the same 2.4GHz wi-fi network. This precise categorization tells the platform exactly which connection protocol to use.
Question-Answer:
I just bought my first Tuya smart plug. What are the very first steps to set it up?
First, ensure the smart plug is powered on. Download the “Tuya Smart” or “Smart Life” app from your phone’s official app store—they are the same. Open the app and create an account using your email or phone number. Tap the ‘+’ icon to add a device. The app will likely auto-detect your plug. If not, select “Socket” or “Smart Plug” from the list. Follow the on-screen instructions: make sure your phone is connected to your 2.4GHz Wi-Fi network (Tuya devices don’t work on 5GHz) and enter your Wi-Fi password. The plug will enter pairing mode, often indicated by a blinking light. Wait for the app to connect it. Once done, you can rename it (e.g., “Bedroom Lamp”) and control it with the on/off button in the app.
Why won’t my Tuya device connect during setup? The light is blinking but the app can’t find it.
This is a common issue. Check these points: 1) Your phone must be on a 2.4GHz Wi-Fi band. Disable your phone’s mobile data temporarily to force it. 2) You are entering the correct Wi-Fi password. 3) Your router uses a simple password without special characters; some older devices struggle with those. 4) You are within range of your router. Move the device closer. 5) Try resetting the device by holding its button for 5-10 seconds until it flashes rapidly, then start the process again. If problems continue, restart your router and phone.
Can I control my Tuya devices when I’m not at home?
Yes, but it requires a specific setup. Remote control needs a Tuya-compatible hub, like a smart speaker or a dedicated gateway, to act as a bridge. Many users connect their Tuya account to Amazon Alexa or Google Home. Once linked, you can use the Alexa or Google Home app from anywhere to control devices shared to that ecosystem. Without a hub or voice assistant link, the app typically only works on your home Wi-Fi network.
What’s the difference between Scenes and Automations in the Tuya app? They seem similar.
They serve different purposes. A **Scene** is a manual one-tap trigger. You set a condition like “When I tap ‘Movie Night,’ turn off the living room lights and turn on the TV backlight.” You must activate it yourself. An **Automation** runs by itself based on rules. For example, “When the motion sensor detects movement after sunset, turn on the hallway light for 2 minutes.” Scenes are for immediate control; automations handle tasks for you. You can also use a Scene as an action inside an Automation.
I’m worried about privacy. What data does the Tuya app collect, and can it work offline?
Tuya devices need an internet connection to the Tuya cloud for initial setup, remote access, and voice control. This involves transmitting device status and commands. For basic local control within your home network, some devices support a local mode if you use a Tuya gateway hub. Regarding data, Tuya’s policy states they collect operational data to function. To improve privacy, use a separate Wi-Fi network for smart devices if your router allows it, create a strong account password, and review the app’s permissions on your phone, disabling access to contacts or location if not needed. Regular app updates also address security.

